Today we debut a new series on food photography with Tessa Huff of Style Sweet CA. Over the coming months Tessa will be showing us how she styles and photographs the wide array of baked goods and desserts she creates by breaking down her photos for us. There will be lots of tips and tricks to help guide you with your own food photography, as well as a healthy dose of inspiration. Today she starts us off with some photography and food styling basics.

We all know that most people eat with their eyes first. If you’re working at a restaurant or throwing a dinner party, plating the food is almost as important as its taste. As food bloggers, we rely on photos to hook readers and get them salivating enough to make the recipe. And with so many food bloggers out there and free recipes floating around the Internet, it’s usually the thoughtfully composed and artfully styled photos that set the great blogs apart from the others.
Like me, most bloggers work from home, and it’s comforting to know that you don’t need an entire studio or an arsenal of lights and flashes to get professional-quality photos. With just a nice camera and some natural light, anyone can create a mouth-watering photo for a blog these days. However, sometimes this is easier said than done.
While I could write a book on my thoughts on food photography, hopefully the tips and concepts I provide here will be enough to help you define your workflow and elevate your photos. Before we start breaking down my photos in upcoming posts, let’s touch briefly on some basics.
Food Photography Lighting
To start a conversation about lighting, you must define your light source. As mentioned, you don’t need an abundance of artificial light to take great photos. Instead, many food photographers, especially those that work from home, rely on natural lighting.
Finding The Light
Some may be inclined to find the brightest spot in their home to set up shop. However, not only does the brightest spot not always produce the best photos, but natural light isn’t constant. If you have some free time, watch how the light changes in your home throughout the day. Consider windows in different rooms at different times of day and even outside to find the best source for the photo in question.
How To Manipulate Natural Light

Direct sun might be a bit harsh in certain situations, while cloudy skies may create their own set of problems. Cheap foam core works wonders for bouncing back light; invest in both white and black for different scenarios. Reflectors (white, gold, and silver) are fairly inexpensive and can reflect light back to your subject when light is limited. Also, a plain white sheet can diffuse direct sun.
Determining the Direction of Light
Once you find the light, determine the direction from which you want it to hit your subject.
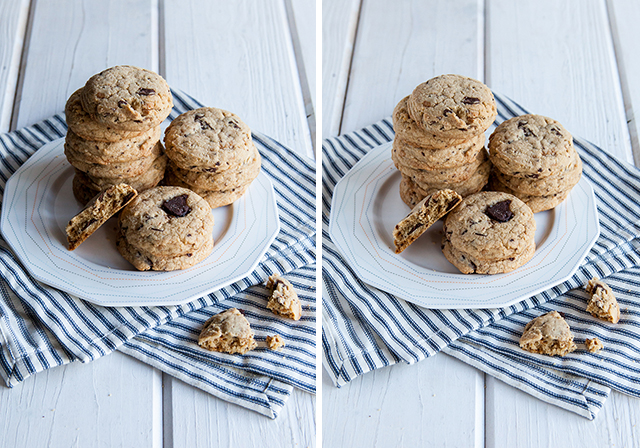
Side Light: Depending on the amount of light coming in, side light can create dramatic shadows or bright and airy photos. Great for more vertical compositions and adding dimension.
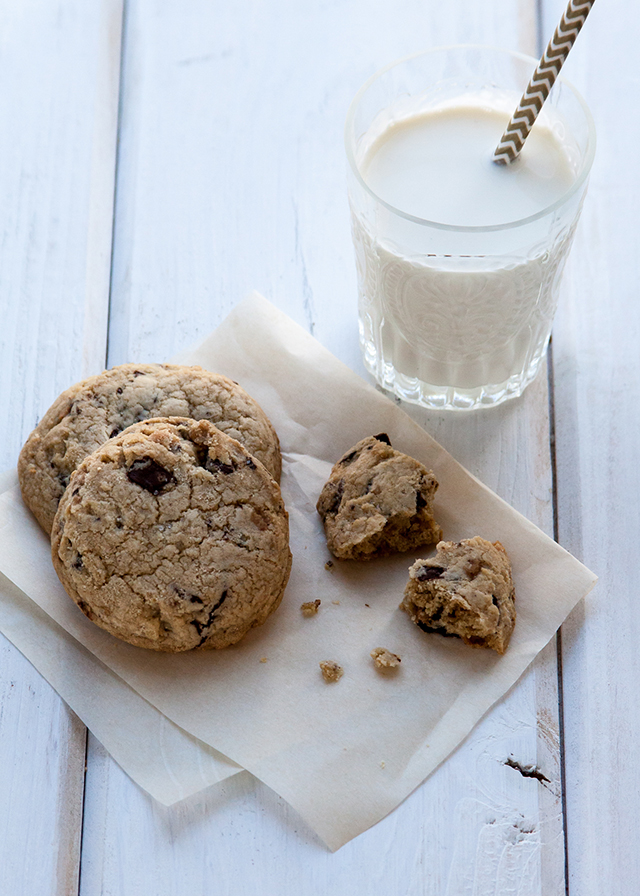
Back Light: Back light wraps beautifully around the subject when bounced and diffused properly. Great for photographing liquids, soups, or glazed desserts as it reflects off the surface.
Front Light: I personally don’t use front-lighting often with food as it can flatten an image and doesn’t produce much contrast.
Soft Light: Indirect light or light that’s coming from different directions can be bounced and diffused to create soft shadows and airy photos. Consider this when shooting outside or in a bright room with large or multiple windows.
Story-telling With Light
A lot of food photography is about telling a story and light plays a huge rule in setting tone and mood. Direct light may create the perfect contrast in a morning brunch or summer picnic scene, while more diffused or reflected light may create more shadows in a moody afternoon tea or chilly evening scene.
Food Photography Composition:
There are many things to keep in mind when composing a photo. Will it be a macro, detailed shot or overhead picture showing the whole table? Will the entire photo be in focus or will you try to direct the eye to a single subject? Consider the following when setting up the shot.
Camera Angle
Different camera angles show different perspectives. Will you be looking at the subject straight on, from the side, or from the top? Choose between straight-on, top-down to get an overhead shot of an entire scene, or a three-quarters angle where it feels like you’re sitting at the table on which the food is being served.
Framing The Image
From wide-angle shots of a whole brunch scene to a tightly cropped picture of just the syrup dripping off a pancake, consider how much of your set-up you want to include in the finished photo and frame the subject accordingly.
Tips For Directing the Viewer's Eye
Apart from having the subject being the only thing in focus or shining a spotlight on it, there are a couple less-obtrusive ways to direct the eye around the photo.
Subject placement: Consider placing the subject front and center, off-centered, and the rule of thirds.
Depth of Field: Use aperture, lens focal length, and distance between subject and camera to help define the subject and determine what stays in focus and fades off into the background.
Props and Styling for Food Photography:
From serving dishes and linens to tabletops and backgrounds, non-food elements help set the mood and tell your food story – even when you decide not to use any at all. A well-stocked “prop closet” gives you options, but I bet there’s plenty to work with within your home and cupboards. Consider mixing and matching serving dishes to create your own style, adding linens for texture and color, and even using ingredients from the recipe as garnish.
Props should add to the story. A flowing piece of ribbon shows great movement when photographing something being used as an edible gift, but probably doesn’t make much sense when paired with a bowl of oatmeal just because it looks pretty.
When styling a photo, try working in layers, adding and taking away props until you define your own style. Experiment with your backdrop and surface, adding on dishes, serving pieces, and flatware, swapping in different linens, and then layering on garnishes and other decorative pieces.
Looking For More?
- Protecting Your Photograph's Copyright
- Five Ways to Improve Your Photo's White Balance
- iPhonography - Some Advice
- Food Photography and Styling Books For Bloggers
Food Photography: Start With the Basics was writing byTessa Huff. Tess is a Vancouver-based pastry artist, food stylist, and photographer. Before moving to British Columbia, she was a cake decorator for several years and owned her own cake boutique. Huff currently runs her blog, Style Sweet CA, and is a freelance recipe developer and photographer. She just completed writing and photographing her first cookbook (Abrams Books, Spring 2016) and is having fun spending time with her husband and their new baby boy.
Follow Tessa on Social Media
Facebook | Twitter | Pinterest | Instagram
You can unsubscribe any time!


Tessa’s photos are always a source of inspiration! What a great choice for this series. Looking forward to the next instalments…