Each month Redawna Kalynchuk draws on her extensive gardening experience to guide you through Growing Your Own Food in Canada. This month, we're doing something a little different: instead of talking about growing food, Redawna explains how to make gorgeous hypertufa pots and faux stone planters for your herbs and edible flowers.

This month we have two very neat projects for creating some spectacular outdoor containers. For the first one we'll be working with concrete to design a hypertufa pot. The second is a bit different: we'll be making faux stone planters. Both projects are inexpensive, gorgeous additions to your garden and will inspire you to create all sorts of cool pots!
What is a Hypertufa Pot?
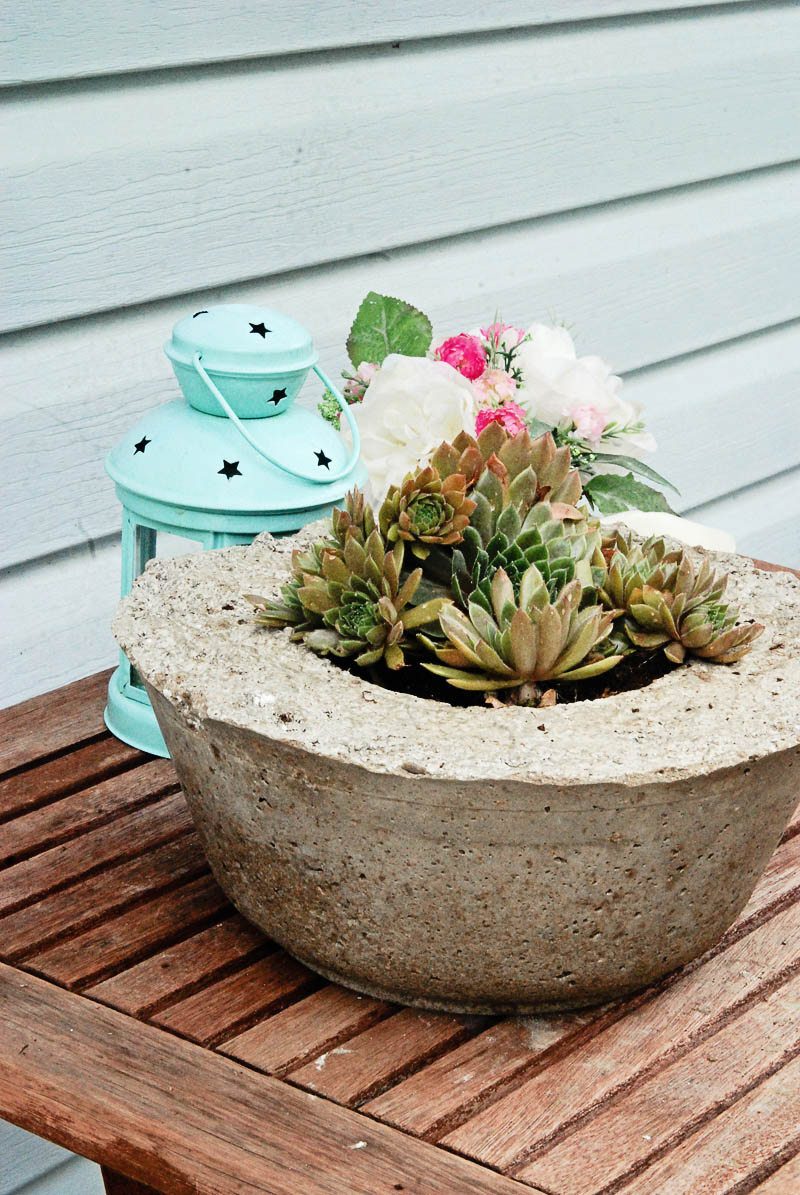
First things first... what is a hypertufa pot? You can be forgiven if you think it sounds like a fancy floor poof you'd put in your living room for people to lounge on! A hypertufa pot is essentially a pot made out of Portland cement combined with other materials like peat moss or coconut coir and perlite or vermiculite. It makes for a relatively lightweight but sturdy planter that's quite porous and can withstand cold temperatures.
How To Make Hypertufa Pots
For our first project we'll be making a hypertufa pot. The list of supplies is short. You need:
- Portland cement
- Peat moss
- Perlite
- Water
- Something to create some drainage holes
- A pair of nice thick rubber gloves as you're going to form the container with your hands
- A dust mask if you're so inclined, as the mixing part of the project will be a bit dusty
- A large container to mix the concrete
- A mould to form the pots in
- Oil, Vaseline or plastic to line the mould
- A large garbage bag for curing the pot
About Making Drainage Holes
You can use anything to make the holes. I used a wine cork placed in the bottom of my container to create the drainage hole. It's easy to cut out of the concrete once the pot is dry. Alternately, you could use a drill to make the holes in the dried container.
Choosing and Preparing the Mould
I used a medium-size plastic bowl, but I plan on making some rectangular and square forms for future hypertufa containers. (I have a feeling I'll be making them on a regular basis.) You can use any type of container, but select one with a shape you love. For your first hypertufa pot go a bit smaller. It'll be easier to make and you can really learn the process with minimal stress.
One thing to note is you don't want to use a container with a lip on the inside — you'll never be able to remove the concrete container from the mould and will have to trash the entire project.
If you're using a plastic mould, oil down the inside with oil or Vaseline to aid in the removal of the hypertufa container. If you're using a metal or wood mould, line the inside with a sheet of thick plastic first. This helps in the removal of the finished container.
Workspace and Supplies

I mixed my concrete in a large container and had everything set up on a table outside.
I found Portland cement at The Home Depot. The bag is heavy so take someone with you to load it if possible. One bag will be enough to make many projects, so don't be too concerned about the size of bag that it comes in.
Perlite and peat moss can be found at any hardware store or garden centre.
What's the Recipe for Hypertufa?
The recipe is a 1:1:1 ratio as follows:
- 1 part Portland cement
- 1 part peat moss
- 1 part perlite
Using a large container, measure out equal parts of the ingredients, estimating how much mixture you need for the size of your container. Add water slowly as you're looking for a certain consistency in the mixture. The goal is to be able to squeeze the mixture so it holds together easily and just a touch of water will drip out. I wore gloves and mixed the Portland mixture with my hands. You can also use a tool of your choice from a garden trowel to shovel, depending on the size of your project.
Test the consistency as you go to avoid adding too much water. If you happen to have too much water in your mix, add some Portland cement to tighten it up (add a handful at a time, mix it in, then test). Once you have good consistency allow the mixture to sit for a few minutes while you assemble your mould.
Forming the Pot

Starting at the bottom of your prepared container, begin to pack the mix into the mould, being sure to make the drainage holes. Next, pat the mixture up the walls of the container. You can leave the centre hollow, shaping it with your hands or you can place a smaller container inside the first container to create the middle. If you do use a second container be sure to oil the surface well before inserting it. I used a container to form the center of my pot. It was sitting a touch unlevel so I weighed it down with a few heavy stones.
Walls should be a minimum of one inch thick. The mould shape had a lot to do with the thickness of the walls of my planter. The steepness made the concrete really want to slide down. A container with less of a slope would be preferred if you're looking to create thinner walls. Keep that in mind when selecting your mould.
Drying and Curing
When you're happy with the thickness of the walls, you need to place the hypertufa pot someplace to dry and cure. The goal is a slow cure, so I recommend placing the containers into a large garbage bag. This holds in the moisture for a nice slow dry. Let it set for 24 to 36 hours. You can test it for dryness after 24 hours. Try to scratch it with your nail; if you can make a mark it's not fully dry. Give it another 12 to 24 hours. When you don't make a mark with the scratch test it's ready to unmould.
Unmoulding the Hypertufa Pot
If it's being stubborn, you can use a rubber mallet to tap the outer container to release the hypertufa pot. If you want to give the surface a bit of texture, you can use a wire brush to scratch it. Have fun with it!
Once you have some experience, you can start making larger containers.
Faux Stone Planters

Next up is our cheater container. The finished product is similar to rough stone and we can play with colour a bit in this project.
Supplies
For the faux stone planter you need:
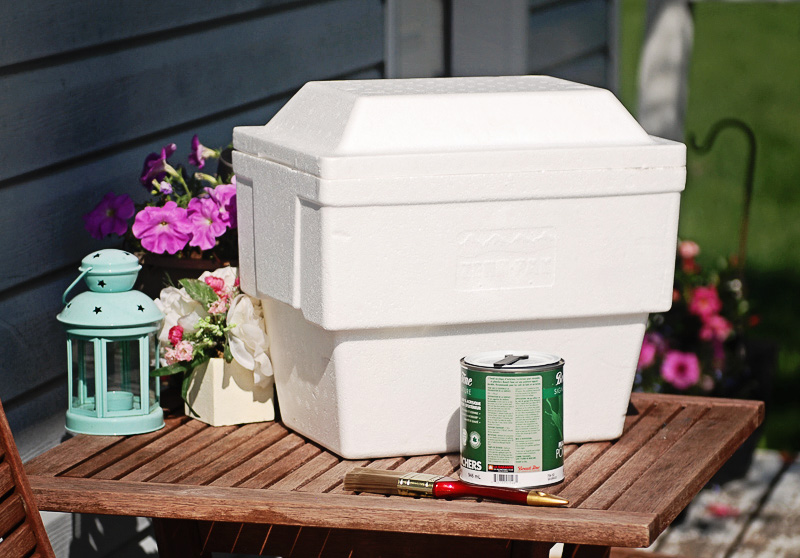
- A Styrofoam cooler
- Sand
- Exterior paint in stone colours
- A paint brush
- Rubber gloves
Once I started shopping for Styrofoam containers I was able to find them everywhere, from grocery stores to my local hardware store. I went with a smaller cooler for my first project but have since picked up a larger one for my next faux stone planter.
I bought a small can of exterior latex paint in a medium grey. The goal is to make it look like stone, so keep that colour palette in mind when shopping for paint. I used a one-inch paint brush. Don't spend too much money on the brush as it gets quite gritty and you'll only want to use it for outdoor projects. The sand can also be found at the hardware store or in some garden centres.
Preparing the Workspace
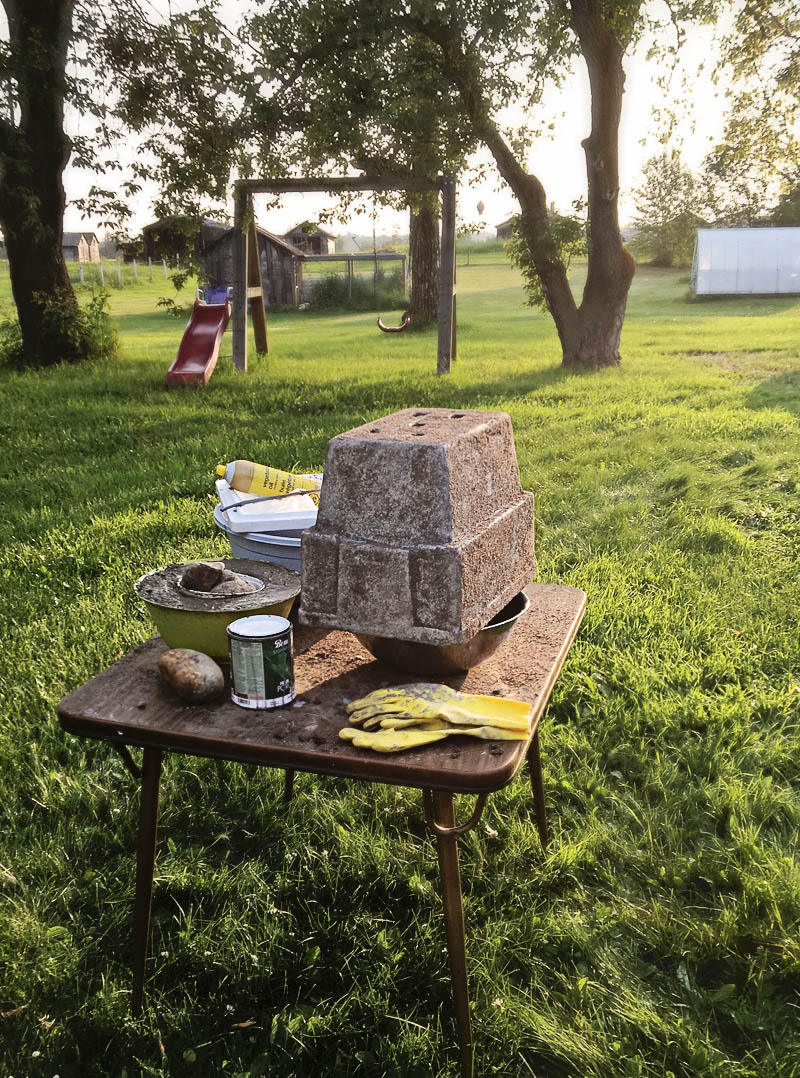
You need to do this project outside as it's messy! Set everything up on a table — on the lawn is best as sand will be everywhere. Cover your table with a sheet of plastic to protect it from paint drips.
Creating a Faux Stone Pot
Using a sharp knife cut drain holes into the bottom of your cooler. Now we get to have some fun!
Start on the inside of the cooler and then work in sections. Use your brush to paint a thick layer of paint over the entire inside of the cooler. Now take a handful of sand and wipe it over the painted surface so it sticks well. Repeat until the walls and bottom of the cooler are fully coated. To contain the sand I did this over a very large steel bowl to catch the excess sand.

Now we move to the exterior of the cooler. I found it easiest to work on one side at a time. Once all four walls were done I placed the cooler over the bowl to cover the bottom.
Set the faux stone pot aside to dry. Where you live and the temperature will dictate the length of the drying time. It's been very humid here so I left the paint to dry for 24 hours.
Do this entire paint and sand process three times to create a nice rough surface on the cooler. The layers of sand don't need to be even or completely cover the surface. Think about creating uneven layers to add to the visual texture of the planter. Another way to be creative is to use two colours of paint to add extra depth and variation.
Once the final coat is dry, your faux stone planter is ready to be planted and placed on the patio or in the garden.
MORE READING
- Grow Your Own Food: How To Grow Tomatoes
- Grow Your Own Food: Summer Gardening Chores
- Grow Your Own Food: A Guide To Garden Irrigation
Grow Your Own Food is written by Redawna Kalynchuk. Redawna is the writer, photographer and content creator at Nutmeg Disrupted. She has over 20 years of gardening experience and has gardened from indoors under high-powered lights to frosty zone 2b gardens in northern Alberta. She enjoys pushing the boundaries of traditional gardening and loves empowering others to grow their own food. You can follow her on Facebook, Twitter, Instagram and Pinterest.
You can unsubscribe any time!


Leave a Reply